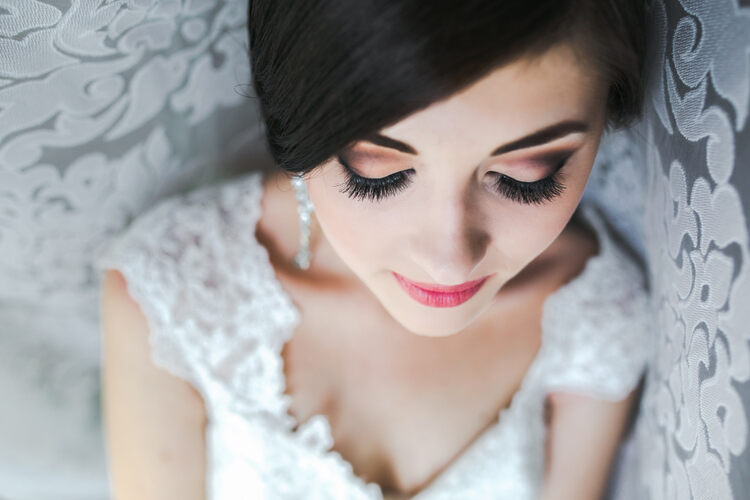
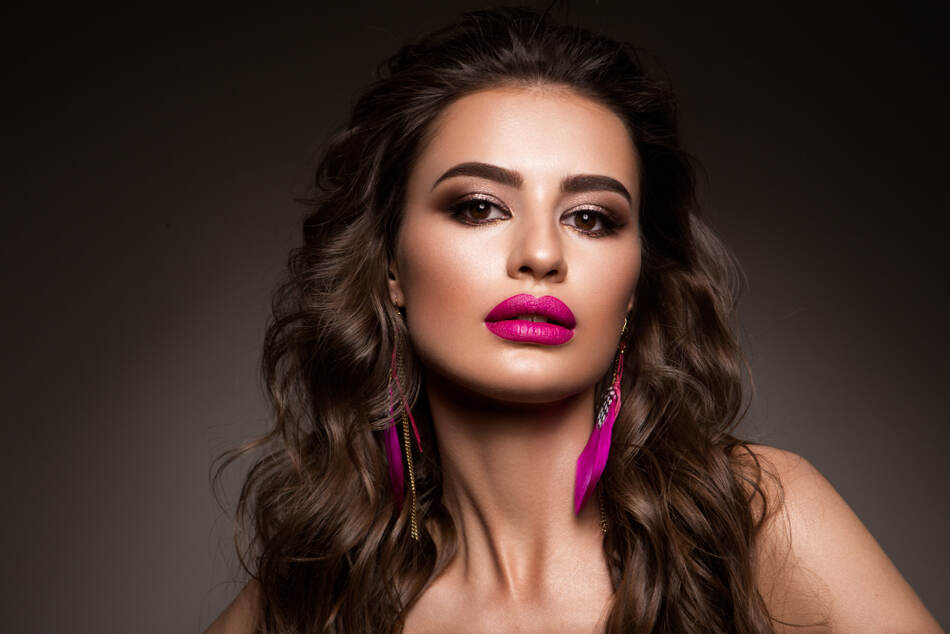
Planning for your big day? Dive into the world of bridal beauty with our comprehensive Step-by-Step Guide: Bridal Makeup Tips. From choosing the right products to executing flawless techniques, this guide covers everything you need for a stunning bridal look.
1. Prep Your Canvas with Skincare Routine
Table of Contents
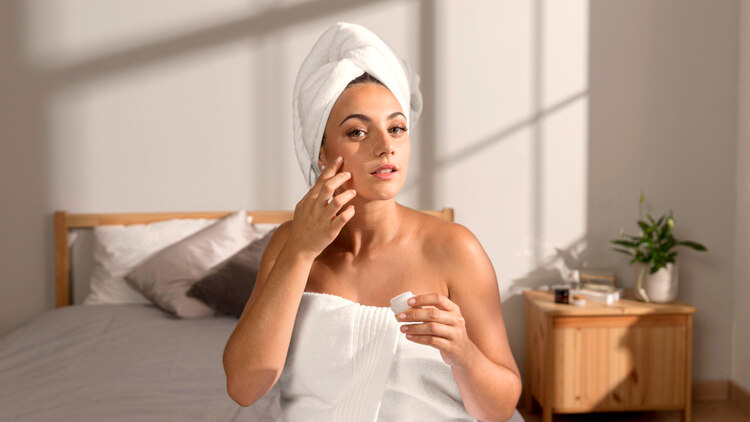
Your wedding day is a celebration of love, and your radiant skin should be part of the festivities. Bridal skincare is essential for achieving a flawless base, ensuring your makeup looks impeccable and lasts throughout the day. Let’s explore the step-by-step process to prep your canvas with a personalized skincare routine.
Preparing the Skin
Skincare Routine for Brides
To achieve a luminous complexion on your wedding day, start with a dedicated skincare routine. Consider the following steps:
- Cleansing: Begin with a gentle cleanser to remove impurities and excess oil, leaving your skin fresh and ready.
- Toning: Apply a toner to balance the skin’s pH levels, preparing it to absorb the upcoming skincare products.
- Moisturizing: Hydrate your skin with a nourishing moisturizer suitable for your skin type, creating a smooth base for makeup application.
- Exfoliation: Include a weekly exfoliation step to remove dead skin cells, promoting a radiant and even skin tone.
- Masks: Treat your skin to a hydrating or brightening mask to address specific concerns and enhance your natural glow.
By incorporating these steps into your routine, you lay the foundation for flawless bridal beauty.
Choosing the Right Products
Makeup Products for Brides
Selecting the right skincare products is crucial for optimal results. Look for products tailored to your skin type and concerns. Bridal skincare often involves:
- Serums: Target specific concerns like fine lines or uneven texture with a serum containing potent ingredients.
- Eye Creams: Combat dark circles and puffiness with a hydrating and firming eye cream.
- SPF: Incorporate a high-quality sunscreen to protect your skin from harmful UV rays.
Investing in these products ensures your skin is prepped and primed for the upcoming makeup application.
2. Choosing the Perfect Foundation Match
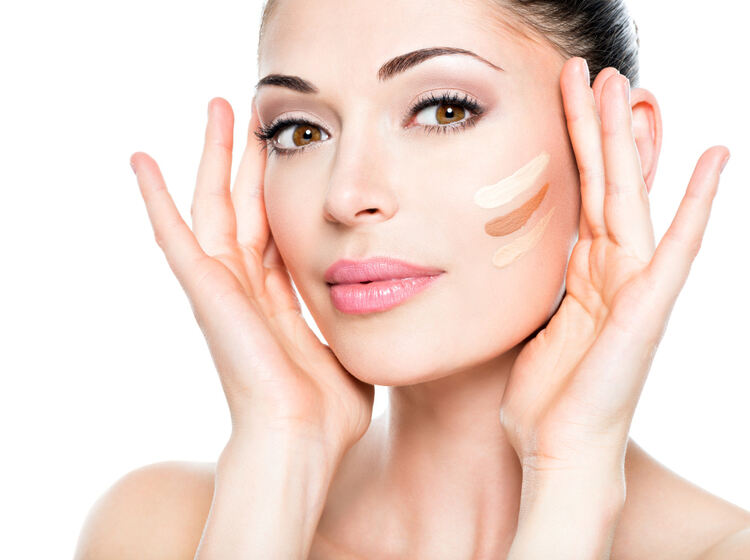
Your foundation serves as the canvas for the entire bridal look. A well-matched foundation enhances your skin’s natural beauty, providing a flawless base for other makeup products. Let’s dive into the step-by-step process of choosing the perfect foundation match.
Choosing the Perfect Foundation Match
Understanding Undertones
- Warm Undertones: If you have yellow, peachy, or golden hues in your skin, opt for foundations with warm undertones. Look for shades labeled “beige” or “golden” for a harmonious blend.
- Cool Undertones: If your skin leans towards pink, blue, or red undertones, choose foundations with cool undertones. Shades labeled “rose” or “porcelain” work well to complement cool undertones.
- Neutral Undertones: If your veins appear blue-green and your skin has a balanced mix of warm and cool tones, go for foundations labeled “neutral” or “ivory” for a versatile match.
Testing in Natural Light
Always test foundation in natural light to ensure an accurate match. Swipe a few shades on your jawline and choose the one that seamlessly disappears into your skin. Natural light provides the most accurate representation of how your foundation will look.
Skin Type Considerations
- Dry Skin: Opt for hydrating foundations with a dewy finish to prevent emphasizing dry patches.
- Oily Skin: Choose oil-free, matte foundations to control shine and provide a long-lasting finish.
- Combination Skin: Look for foundations labeled “balanced” or “combination” to address both dry and oily areas.
Application Techniques
- Primer Application: Apply a primer to create a smooth base, helping the foundation adhere better.
- Use the Right Tools: Brushes, sponges, and fingers all have their merits. Experiment with different tools to find what works best for your preferred finish.
- Blend, Blend, Blend: Blend the foundation seamlessly into your skin, paying attention to the jawline and neck for a natural transition.
3. Accentuate Your Eyes with Eyeshadow Magic

Accentuating your eyes enhances their shape, color, and overall allure. Eyeshadow magic is not just about adding color; it’s about creating depth and dimension that complements your bridal ensemble. Let’s explore the step-by-step process of achieving mesmerizing eyes.
Accentuating Your Eyes with Eyeshadow Magic
Understanding Your Eye Shape
- Almond Eyes: Enhance your natural shape by focusing on the outer corners. Experiment with a variety of eyeshadow colors to highlight the versatility of almond eyes.
- Round Eyes: Create the illusion of elongation by applying darker shades to the outer corners and lighter shades towards the inner corners.
- Hooded Eyes: Emphasize the crease with a slightly darker shade to add definition. Use shimmer on the center of the lids to draw attention.
- Monolid Eyes: Opt for gradient eyeshadow, darkening towards the outer corners. Add a pop of shimmer on the center for a captivating effect.
Choosing the Right Eyeshadow Colors
- Neutral Tones: Perfect for classic, timeless looks. Browns, taupes, and creams work well for a subtle yet elegant appearance.
- Bold Colors: Experiment with bold shades that complement your wedding theme. Jewel tones or metallics can add a touch of glamour.
- Smoky Eyes: Ideal for evening weddings, smoky eyes create a sultry and sophisticated vibe. Choose grays, blacks, or deep purples for added drama.
Eyeshadow Application Techniques
- Primer Application: Apply an eyeshadow primer to ensure longevity and vibrant color payoff.
- Transition Shade: Start with a transition shade that complements your skin tone, creating a seamless blend.
- Outer Corner Definition: Darken the outer corners of your eyes for added depth. Blend well to avoid harsh lines.
- Center Lid Pop: Apply a shimmer shade to the center of your lids for a captivating, light-catching effect.
4. Eyeliner Mastery for Striking Eyes
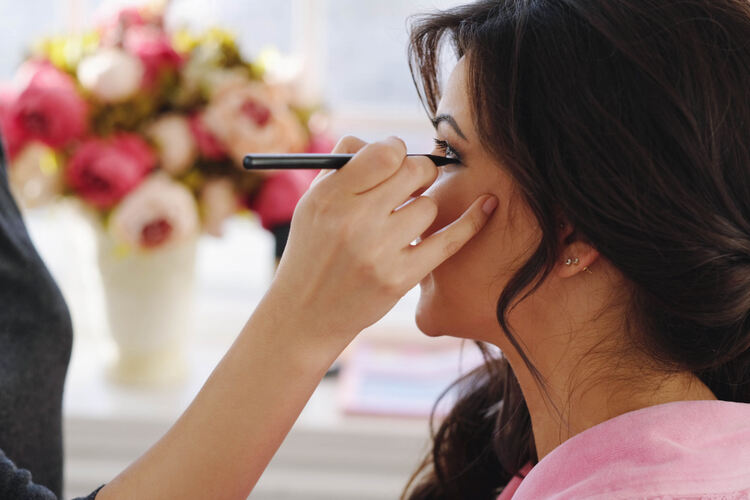
Eyeliner has the power to define, shape, and intensify your eyes. Whether you prefer a subtle enhancement or a bold, dramatic look, mastering eyeliner application is key to achieving striking eyes that leave a lasting impression. Let’s dive into the step-by-step process of eyeliner mastery.
Eyeliner Mastery for Striking Eyes
Choosing the Right Eyeliner Type
- Pencil Eyeliner: Ideal for a softer, more natural look. Great for beginners and those aiming for a smudged effect.
- Liquid Eyeliner: Perfect for precision and dramatic lines. Ideal for achieving a crisp, defined look.
- Gel Eyeliner: Offers the best of both worlds – precision like liquid eyeliner and a softer application like pencil eyeliner.
Eyeliner Application Techniques
- Tightlining: Apply eyeliner along the waterline to define the eyes without a noticeable line. Perfect for a subtle yet impactful look.
- Winged Eyeliner: Create a classic winged look for added drama and a lifted appearance. Adjust the angle and length based on your preference.
- Smudged Eyeliner: Achieve a sultry, lived-in look by gently smudging the eyeliner with a brush or cotton swab. Perfect for a romantic, softer gaze.
- Double Eyeliner: Experiment with dual lines – a thin line along the lash line and a complementary color or style above for added flair.
Tips for Eyeliner Mastery
- Steady Hand: Use your non-dominant hand to pull your eyelid taut for a smoother application.
- Practice Makes Perfect: Experiment with different styles and techniques leading up to your wedding day to find the look that suits you best.
- Waterproof Formulas: Opt for waterproof eyeliner to ensure longevity, especially for emotional moments.
- Matching Styles: Coordinate your eyeliner style with your overall bridal look. A classic wing complements a traditional theme, while a smudged liner suits a more relaxed, bohemian vibe.
5. Luscious Lashes: Mascara Application Tips
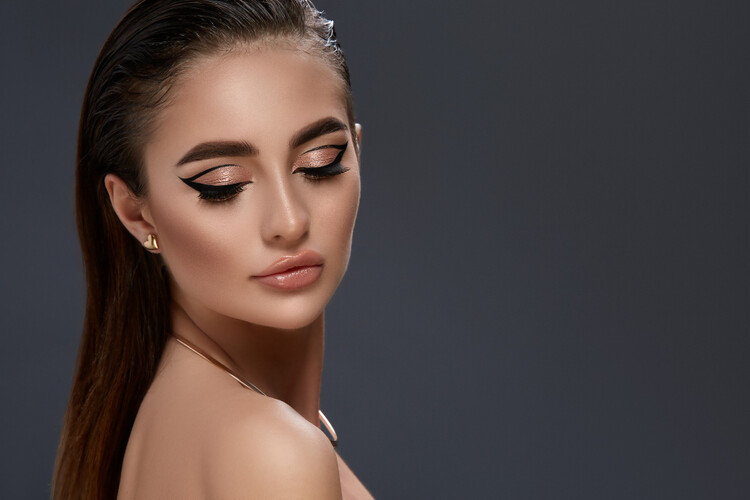
Mascara adds the finishing touch to your eye makeup, creating definition, volume, and length. Proper application enhances your natural lashes, making them appear fuller and more captivating. Let’s delve into the step-by-step process of achieving luscious lashes.
Mascara Application Tips for Captivating Lashes
Choosing the Right Mascara
- Lengthening Mascara: Ideal for those seeking elongated lashes. The formula typically contains fibers that extend each lash.
- Volumizing Mascara: Perfect for adding thickness and fullness to your lashes. Look for a brush with densely packed bristles.
- Waterproof Mascara: Ensures your mascara stays put throughout the day, resisting smudging or running.
Mascara Application Techniques
- Curling Your Lashes: Use an eyelash curler before applying mascara to lift and open up your eyes. Hold for a few seconds for a lasting curl.
- Wiggle and Lift: Start at the base of your lashes and wiggle the wand as you move upwards. This ensures an even application and prevents clumping.
- Layering Techniques: Apply multiple thin coats rather than one thick coat. Allow each layer to dry briefly to avoid clumping.
- Bottom Lash Application: For lower lashes, use the tip of the mascara wand for precision. Apply sparingly to avoid a heavy or spidery effect.
Tips for Long-Lasting Lashes
- Setting Spray: After applying mascara, lightly mist your face with a setting spray to ensure your lashes stay in place throughout the day.
- Avoid Pumping the Wand: Pumping the mascara wand introduces air, leading to the formula drying out faster. Instead, twist the wand gently to coat it.
- Removing Mascara: Use a gentle, oil-based makeup remover to prevent lash breakage. Hold the soaked cotton pad on your closed eyes for a few seconds before gently wiping away.
- Regular Replacements: Mascara should be replaced every three months to ensure optimal performance and hygiene.
6. Sculpt and Define with Contouring Techniques

Contouring allows you to highlight your best features and add dimension to your face, ensuring your bridal makeup looks flawless both in person and in photographs. Let’s delve into the step-by-step process of mastering contouring techniques for a radiant appearance.
Sculpt and Define with Contouring Techniques
Choosing the Right Contour Products
- Contour Palette: Opt for a contour palette with shades that match your skin tone. Look for a mix of matte contour shades and illuminating highlighters.
- Cream or Powder Contour: Choose between cream and powder based on your skin type. Cream contour offers a dewy finish for dry skin, while powder is ideal for oily or combination skin.
- Highlighter: Select a highlighter that complements your skin tone. Champagne tones work well for light to medium skin, while gold or bronze tones suit deeper complexions.
Contouring Application Techniques
- Mapping Your Face: Identify the areas you want to contour and highlight, typically cheekbones, nose, jawline, and forehead.
- Contouring Cheekbones: Apply contour along the hollows of your cheekbones in a diagonal line towards your temples. Blend well for a seamless finish.
- Nose Contouring: Use a smaller brush to contour the sides of your nose for a slimmer appearance. Apply highlighter down the bridge to enhance the effect.
- Jawline Contour: Define your jawline by applying contour along the lower edge. Blend downwards to avoid harsh lines.
- Forehead Contour: Apply contour along your hairline on the forehead to minimize the appearance of its size. Blend thoroughly for a natural look.
Tips for Flawless Contouring
- Blend, Blend, Blend: The key to successful contouring is seamless blending. Use a makeup sponge or brush to ensure a natural transition between contour and highlight.
- Less is More: Start with a small amount of product, gradually building up if needed. It’s easier to add than to remove excess contour.
- Check in Natural Light: Contouring can look different in various lighting conditions. Check your makeup in natural light to ensure a balanced and well-blended look.
- Setting Spray: Lock in your contour with a setting spray to ensure it stays in place throughout your wedding day.
7. Blushing Beauty: Applying the Perfect Blush
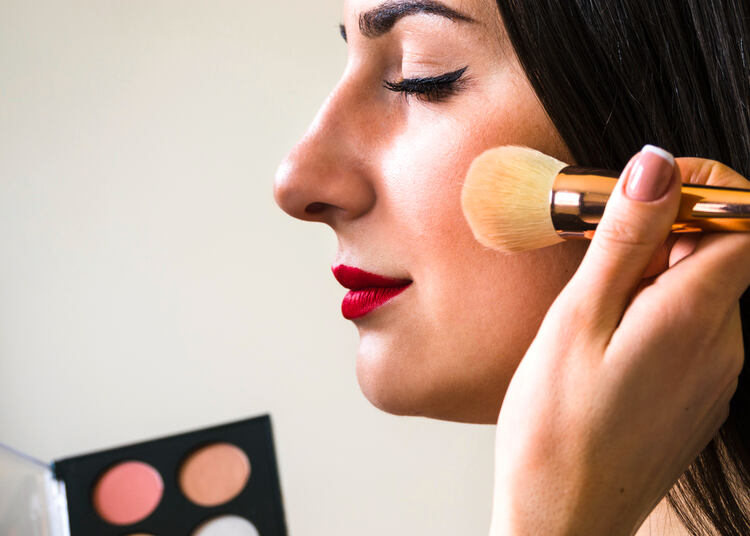
Blush adds warmth, dimension, and a touch of color to your bridal makeup, creating a youthful and romantic glow. Proper application enhances your overall look, ensuring your cheeks are kissed with a subtle and natural flush. Let’s delve into the step-by-step process of achieving the perfect blush.
Blushing Beauty: Applying the Perfect Blush
Choosing the Right Blush Shade
- Skin Undertones: For warm undertones, opt for peachy or coral blushes. For cool undertones, choose rosy or pink shades. Neutral undertones can experiment with a variety of shades.
- Occasion and Makeup Look: Consider the overall makeup look and occasion. Soft, muted tones work well for a classic bridal look, while bolder shades may complement a more vibrant theme.
- Formulation: Choose between powder, cream, or liquid blush based on your skin type. Powder is ideal for oily skin, while cream or liquid formulations offer a dewy finish for dry skin.
Blush Application Techniques
- Face Shape Considerations:
- Round Face: Apply blush slightly above the apples of the cheeks, blending towards the temples.
- Oval Face: Focus on the apples of the cheeks and blend slightly towards the temples.
- Square Face: Apply blush in a diagonal line from the apples towards the hairline.
- Heart-Shaped Face: Concentrate blush on the apples and blend towards the hairline and temples.
- Application Tools:
- Brush: Use a fluffy, angled brush for powder blush, applying in light, upward strokes.
- Fingers: For cream or liquid blush, use your fingers for a seamless, natural finish.
- Build Gradually:
- Begin with a small amount of blush and build up to achieve the desired intensity.
- Smile slightly to identify the apples of your cheeks for precise application.
Tips for Long-Lasting Blush
- Set with Powder: If using cream or liquid blush, set it with a matching powder blush to enhance longevity.
- Layering Technique: Apply blush before setting powder for a natural, blended look that lasts throughout the day.
- Check in Natural Light: Ensure your blush looks balanced in natural light to avoid over-application.
8. Lip Perfection: Choosing and Applying Lipstick
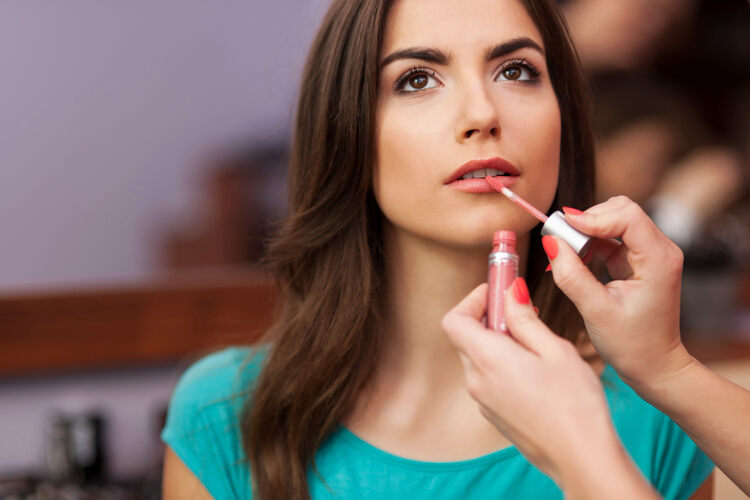
Lipstick is the finishing touch that adds color, definition, and allure to your bridal makeup. Proper application not only enhances your lips but also contributes to the overall harmony of your look. Let’s explore the step-by-step process of achieving lip perfection.
Lip Perfection: Choosing and Applying Lipstick
Choosing the Right Lipstick Shade
- Consider Your Undertone: For warm undertones, opt for shades like coral, peach, or warm reds. Cool undertones suit pinks, berries, and cool reds. Neutral undertones have the flexibility to experiment with a wide range of shades.
- Complement Your Makeup Look: Choose a lipstick shade that complements your overall makeup. Soft nudes work well for a classic look, while bold reds or berries add a touch of glamour.
- Consider Your Dress Color: Harmonize your lipstick with your dress color. If your dress is ivory or off-white, warmer tones may work best, while white dresses pair well with cool tones.
Lipstick Application Techniques
- Prep Your Lips: Ensure your lips are smooth and moisturized before applying lipstick. Exfoliate if needed and use a lip balm for hydration.
- Lip Liner for Definition: Outline your lips with a lip liner that matches your lipstick shade. This provides a defined shape and prevents color bleeding.
- Application Tools:
- Lipstick Tube: For a precise application straight from the tube.
- Lip Brush: Offers control for a more detailed and polished look.
- Even Application:
- Start at the center of your lips and move outward for an even distribution of color.
- Blot with a tissue and reapply for longer-lasting wear.
Tips for Long-Lasting Lipstick
- Set with Powder: For matte lipsticks, set with a translucent powder for extended wear.
- Blotting Technique: After application, gently blot your lips with a tissue to remove excess product and enhance staying power.
- Avoid Over-Application: Apply thin layers of lipstick to prevent a heavy or cakey appearance.
9. Setting the Look: Makeup Setting Tips

Makeup setting is crucial to prevent smudging, fading, or any unwanted shifts in your carefully crafted bridal look. Setting products help your makeup withstand tears, hugs, and hours of celebration, ensuring you look stunning from the first photo to the last dance.
Setting the Look: Makeup Setting Tips
Choosing the Right Setting Products
- Setting Spray:
- Choose a setting spray suitable for your skin type, whether it’s mattifying for oily skin or hydrating for dry skin.
- Hold the setting spray at arm’s length and mist it over your face in a cross and T formation for even coverage.
- Setting Powder:
- Opt for a translucent setting powder to avoid altering the color of your makeup.
- Use a fluffy brush to lightly dust the powder over your face, focusing on areas prone to oiliness.
- Setting Mist:
- A setting mist with hydrating properties can be a great choice, especially for a dewy finish.
- Spritz the mist a few times and allow it to air dry for a fresh and luminous look.
Setting Techniques
- Baking:
- Apply a generous amount of setting powder under your eyes, along the sides of your nose, and on your forehead.
- Let the powder sit for a few minutes before dusting away the excess for a crease-free finish.
- Layering Setting Products:
- Layering setting spray over setting powder helps set the makeup and adds a natural glow.
- Finish with a final spritz of setting mist for a luminous look without excess shine.
- Setting Individual Features:
- For specific areas like the under eyes or T-zone, use targeted setting to ensure longevity without over-powdering.
Tips for Long-Lasting Makeup
- Prep Your Skin:
- Start with a well-moisturized and primed face to provide a smooth base for makeup application.
- Use a setting spray before applying foundation to enhance its adherence.
- Avoid Overloading:
- Apply setting products in light layers to prevent a heavy or cakey appearance.
- Blot excess product with a tissue to maintain a natural finish.
10. Hair and Makeup Harmony
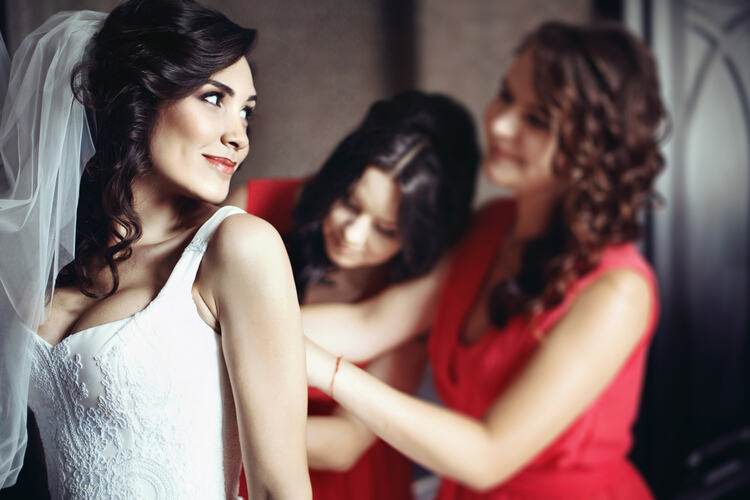
The interplay of hair and makeup is the essence of a balanced bridal appearance. When executed harmoniously, your hair and makeup create a cohesive and polished look that enhances your features and complements your overall bridal style. Let’s dive into the step-by-step process of achieving this perfect balance.
Hair and Makeup Harmony: Achieving the Perfect Look
Consider Your Bridal Style
- Classic Elegance:
- Opt for timeless hairstyles like a chignon or soft waves.
- Classic makeup with neutral tones enhances the elegance.
- Bohemian Vibes:
- Loose braids, floral accessories, or beachy waves complement a bohemian hairstyle.
- Natural and earthy tones in makeup enhance the boho chic style.
- Glamorous Affair:
- Choose a glamorous updo or voluminous curls for a sophisticated hairstyle.
- Bold and defined makeup with smoky eyes or a vibrant lip complements the glam look.
Coordinate Colors
- Dress Color and Undertones:
- Match the undertones of your makeup with your dress color.
- Cool-toned dresses pair well with cool-toned makeup, while warm tones complement warm-colored dresses.
- Hair Color:
- Consider your hair color when selecting makeup shades.
- Blonde hair may be enhanced with softer hues, while darker hair allows for bolder choices.
Trial Sessions
- Trial Hair and Makeup Together:
- Schedule a trial where both your hairstylist and makeup artist collaborate.
- Ensure the chosen styles complement each other.
- Photograph the Trial:
- Take photographs during the trial to assess how the hair and makeup translate in pictures.
- Make any necessary adjustments for a flawless outcome on the wedding day.
Seamless Transitions
- Blending Makeup with Hairstyle:
- Ensure a smooth transition between the face and hairline by blending makeup seamlessly.
- Pay attention to the jawline and neck to avoid any visible demarcation.
- Softening Hair Accessories:
- If incorporating accessories, ensure they enhance, not overpower, the overall look.
- Hairpieces and veils should complement, not compete with, your makeup.
11. Avoiding Common Bridal Makeup Mistakes
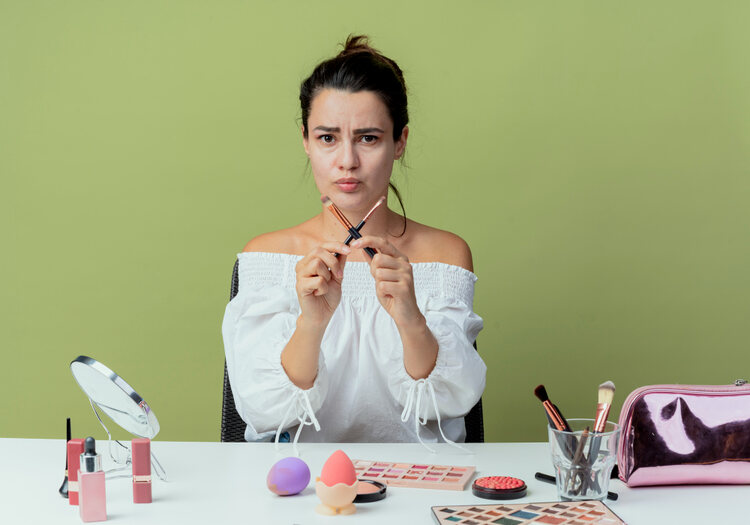
Avoiding common makeup mistakes is crucial for achieving a picture-perfect bridal look. From choosing the right products to application techniques, steering clear of pitfalls ensures your makeup enhances your natural beauty without any regrets when you look back at your wedding photos.
Avoiding Common Bridal Makeup Mistakes: A Comprehensive Guide
Choosing the Right Foundation Shade
- Testing in Natural Light:
- Avoid the mistake of testing foundation indoors only. Test it in natural light to ensure a seamless match with your skin tone.
- Matching Undertones:
- Ensure the foundation undertones match your skin. Cool undertones should pair with cool foundations, and warm undertones with warm foundations.
Overlooking a Makeup Trial
- The Importance of a Trial:
- Don’t skip a makeup trial. It helps you and your makeup artist understand your preferences and ensures a flawless look on the big day.
- Photograph the Trial:
- Take photographs during the trial to assess how the makeup translates in pictures. Adjustments can be made for a more photogenic look.
Heavy Contouring Mistakes
- Balance is Key:
- Avoid overly heavy contouring. Balance is crucial for a natural appearance that photographs well.
- Blend Thoroughly:
- Blend contour and highlight seamlessly to prevent harsh lines. Proper blending ensures a soft and radiant finish.
Ignoring Skincare Prep
- Prep for Longevity:
- Skipping skincare prep is a common mistake. Start with a well-moisturized and primed face for makeup that lasts all day.
- Exfoliate and Hydrate:
- Exfoliate your skin before the big day and keep it hydrated. This creates a smooth canvas for makeup application.
Neglecting Lip Care
- Prep Lips:
- Neglecting lip care can lead to dryness. Exfoliate your lips and keep them moisturized for a flawless and lasting lip color.
- Lip Liner Precision:
- Overlooking lip liner precision is a mistake. Use it to define your lips and prevent feathering.
12. Emergency Touch-Up Kit Essentials

An emergency touch-up kit is a bridal essential, ensuring you can refresh your makeup on the go. From teary moments to dancing the night away, having these essentials at hand helps you maintain your picture-perfect look throughout the celebration.
Emergency Touch-Up Kit Essentials: A Checklist
1. Blotting Papers:
- Why: Control excess shine without adding extra layers of powder.
- Tip: Press, don’t rub, to avoid disrupting your makeup.
2. Pressed Powder:
- Why: Set foundation and prevent excess oil.
- Tip: Use a small brush or puff for precise application.
3. Concealer:
- Why: Cover blemishes or touch up under-eye areas.
- Tip: Choose a creamy formula for easy blending.
4. Lip Color:
- Why: Maintain vibrant lip color throughout the day.
- Tip: Include the lip product you used for easy touch-ups.
5. Mascara:
- Why: Refresh lashes for a wide-eyed look.
- Tip: Opt for a waterproof formula to withstand tears.
6. Setting Spray:
- Why: Lock in makeup and refresh your overall look.
- Tip: Hold at arm’s length for an even mist.
7. Q-Tips or Cotton Swabs:
- Why: Correct makeup smudges or mishaps.
- Tip: Dampen for precise cleanup without removing foundation.
8. Hairpins or Bobby Pins:
- Why: Secure loose strands or adjust your hairstyle.
- Tip: Match the color to your hair for a discreet touch-up.
9. Tissues or Facial Tissues:
- Why: Blot excess oil or wipe away tears.
- Tip: Choose tissues without added lotion to avoid disturbing makeup.
10. Miniature Mirror:
- Why: Check your makeup and make adjustments.
- Tip: Choose a compact mirror for convenience.
13. Bridal Makeup for Different Skin Types

Every bride deserves makeup that enhances her unique beauty. In this segment, we’ll explore the nuances of bridal makeup for different skin types, providing a step-by-step guide and expert tips to help you achieve a personalized and stunning bridal look.
Understanding Different Skin Types
1. Oily Skin:
- Characteristics: Excess oil, enlarged pores.
- Makeup Goals: Control shine, long-lasting wear.
2. Dry Skin:
- Characteristics: Flakiness, tightness.
- Makeup Goals: Hydration, luminosity.
3. Combination Skin:
- Characteristics: Oily T-zone, dry cheeks.
- Makeup Goals: Balance, seamless transition.
4. Sensitive Skin:
- Characteristics: Redness, irritation.
- Makeup Goals: Non-irritating, calming.
Bridal Makeup for Different Skin Types: A Tailored Approach
Makeup for Oily Skin
- Primer:
- Use a mattifying primer to control oil and create a smooth base.
- Oil-Free Foundation:
- Choose an oil-free, long-wearing foundation for a matte finish.
- Setting Powder:
- Set your makeup with a translucent powder to minimize shine.
- Blotting Papers:
- Keep blotting papers on hand for touch-ups throughout the day.
Makeup for Dry Skin
- Hydrating Primer:
- Begin with a hydrating primer to create a dewy base.
- Moisturizing Foundation:
- Opt for a foundation with a hydrating formula for a luminous look.
- Cream Blush:
- Use a cream blush to add a natural flush and maintain hydration.
- Hydrating Setting Spray:
- Finish with a hydrating setting spray for a fresh appearance.
Makeup for Combination Skin
- Balancing Primer:
- Use a primer that balances both oiliness and dryness.
- Dual-Finish Foundation:
- Choose a foundation with a dual-finish for a seamless look.
- Targeted Concealing:
- Use concealer only where needed to maintain balance.
- Translucent Powder for T-Zone:
- Apply a translucent powder to the T-zone for oil control.
Makeup for Sensitive Skin
- Hypoallergenic Products:
- Opt for hypoallergenic and fragrance-free products.
- Calming Primer:
- Choose a primer with soothing ingredients like chamomile.
- Mineral Foundation:
- Use a mineral foundation for a gentle and natural finish.
- Gentle Makeup Remover:
- Select a gentle makeup remover to avoid irritation during removal.
14. Photography-Friendly Makeup Techniques

Photography-friendly makeup ensures your beauty translates seamlessly from real-life moments to timeless photographs. Techniques that enhance your features without appearing overly dramatic or washed out are key to achieving a stunning visual impact.
Photography-Friendly Makeup Techniques: A Comprehensive Guide
1. Natural-Looking Foundation:
- Use a foundation that matches your skin tone perfectly.
- Avoid foundations with SPF, as they can create a flashback in photos.
2. Soft Contouring and Highlighting:
- Opt for a soft contour to define features without harsh lines.
- Use a subtle highlighter on high points for a natural glow.
3. Avoiding Flashback with Setting Powder:
- Choose a translucent setting powder to set your makeup.
- Test the powder in flash photography to ensure no flashback occurs.
4. Matte and Long-Lasting Lip Color:
- Select a matte lip color for a sophisticated look.
- Ensure the lip color is long-lasting for minimal touch-ups.
5. Defined Eyes without Heavy Liner:
- Define eyes with eyeshadow rather than heavy eyeliner.
- Opt for neutral or earthy tones for a timeless appeal.
6. Flawless Blending:
- Blend makeup thoroughly to avoid any harsh lines.
- Ensure a seamless transition between different makeup products.
7. Setting Spray for Longevity:
- Use a setting spray to lock in makeup for lasting freshness.
- Hold the spray at arm’s length for an even application.
15. Step-by-Step Guide: Bridal Makeup Tips – Bringing It All Together

As your wedding day approaches, perfecting your bridal makeup becomes a priority. This guide brings together all aspects, providing a seamless step-by-step approach to ensure your bridal beauty shines from skincare prep to photography-friendly techniques.
1. Prep Your Canvas with Skincare Routine:
- Begin your bridal makeup journey with a well-prepared canvas. Follow a skincare routine to cleanse, tone, and moisturize. This sets the stage for flawless makeup application.
2. Choosing the Perfect Foundation Match:
- The foundation is the base of your bridal look. Test in natural light, match undertones, and choose a formula that suits your skin type for a perfect foundation match.
3. Accentuate Your Eyes with Eyeshadow Magic:
- Move to the eyes, opting for eyeshadow shades that complement your dress and overall bridal style. Blend well for a seamless and enchanting eye look.
4. Eyeliner Mastery for Striking Eyes:
- Master the art of eyeliner for striking eyes. Choose a style that enhances your eye shape, be it a subtle line or a dramatic wing.
5. Luscious Lashes: Mascara Application Tips:
- Frame your eyes with luscious lashes using mascara. Curl lashes before application for an open-eyed and captivating look.
6. Sculpt and Define with Contouring Techniques:
- Sculpt and define your features with contouring. Achieve a balanced and elegant look by emphasizing your cheekbones and defining your jawline.
7. Blushing Beauty: Applying the Perfect Blush:
- Bring a rosy glow to your cheeks with the perfect blush. Choose a shade that complements your skin tone and applies it subtly for a natural flush.
8. Lip Perfection: Choosing and Applying Lipstick:
- Complete your bridal look with lip perfection. Choose a lipstick shade that complements your overall makeup and dress. Define your lips with precision for a flawless finish.
9. Setting the Look: Makeup Setting Tips:
- Ensure your bridal beauty lasts all day by setting the look. Use setting spray to lock in your makeup and maintain a fresh appearance.
10. Hair and Makeup Harmony:
- Achieve a harmonious balance between your hair and makeup. Consider your bridal style, dress, and personal preferences for a cohesive and stunning look.
11. Emergency Touch-Up Kit Essentials:
- Prepare for the unexpected with an emergency touch-up kit. Include blotting papers, pressed powder, lipstick, and other essentials to keep your makeup flawless throughout the celebration.
12. Bridal Makeup for Different Skin Types:
- Tailor your makeup to your skin type. Whether you have oily, dry, combination, or sensitive skin, these personalized tips ensure your bridal beauty is flawless and comfortable.
13. Photography-Friendly Makeup Techniques:
- Ensure your beauty translates seamlessly into photographs with photography-friendly makeup techniques. From foundation choices to avoiding flashback, these tips guarantee stunning visuals.
Conclusion
Embarking on your bridal makeup journey is an exciting adventure. Armed with our Step-by-Step Guide: Bridal Makeup Tips, you’re equipped with the knowledge to create a stunning, long-lasting bridal look. Remember, your wedding day is a celebration of love, and your beauty should shine just as brightly.
